データベースサーバ(MySQL)

MySQL は高速性と堅牢性を追及したマルチユーザ・マルチスレッドのSQLデータベースで、 世界で最も人気のあるフリーのリレーショナルデータベースサーバ。 Movable TypeとかNucleus等を利用する場合は各種データをMySQLデータベースに保存するようになっているので、ここではMySQLを使ったデータベースサーバを構築する。
■MySQLインストール

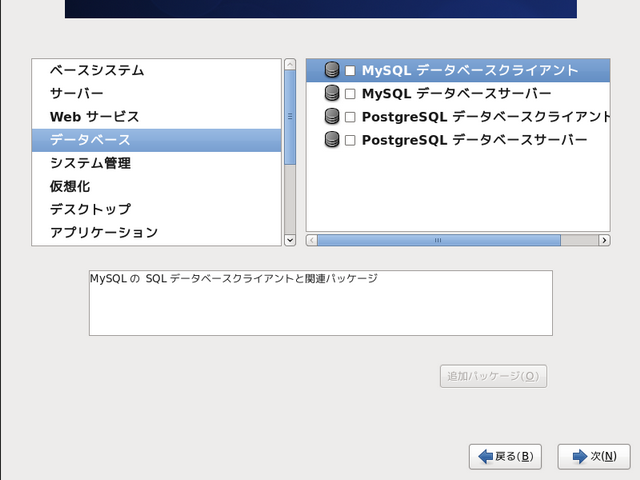
mysql-serverをインストール
[root@server1 ~]# yum -y install mysql-server

■MySQL設定
MySQLサーバーの文字コードとMySQLクライアントの文字コードをUTF-8にする

[root@server1 ~]# vi /etc/my.cnf
[mysqld]
datadir=/var/lib/mysql
socket=/var/lib/mysql/mysql.sock
user=mysql
# Disabling symbolic-links is recommended to prevent assorted security risks
symbolic-links=0
default-character-set = utf8   ← 追加
[mysqld_safe]
log-error=/var/log/mysqld.log
pid-file=/var/run/mysqld/mysqld.pid
最終行に追加
[mysql]
default-character-set = utf8

■MySQL起動

MySQLの起動
[root@server1 ~]# /etc/init.d/mysqld start
MySQL データベースを初期化中:  Installing MySQL system tables...
OK
Filling help tables...
OK
To start mysqld at boot time you have to copy
support-files/mysql.server to the right place for your system
PLEASE REMEMBER TO SET A PASSWORD FOR THE MySQL root USER !
To do so, start the server, then issue the following commands:
/usr/bin/mysqladmin -u root password 'new-password'
/usr/bin/mysqladmin -u root -h server1.yokensaka.com password 'new-password'
Alternatively you can run:
/usr/bin/mysql_secure_installation
which will also give you the option of removing the test
databases and anonymous user created by default.  This is
strongly recommended for production servers.
See the manual for more instructions.
You can start the MySQL daemon with:
cd /usr ; /usr/bin/mysqld_safe &
You can test the MySQL daemon with mysql-test-run.pl
cd /usr/mysql-test ; perl mysql-test-run.pl
Please report any problems with the /usr/bin/mysqlbug script!
[  OK  ]
mysqld を起動中:                                           [  OK  ]

■MySQL自動起動設定

MySQLの自動起動設定
[root@server1 ~]# chkconfig mysqld on
MySQLの自動起動設定確認
[root@server1 ~]# chkconfig --list mysqld
mysqld          0:off   1:off   2:on    3:on    4:on    5:on    6:off
           ランレベル2~5がオンの状態であることを確認

■rootユーザへのパスワード設定
MySQLのrootユーザにはデフォルトではパスワードが設定されていないため、安全のためにパスワードを設定。

MySQLサーバーへrootユーザでログイン
[root@server1 ~]# mysql -u root
[root@server1 higo]# mysql -u root
Welcome to the MySQL monitor.  Commands end with ; or \g.
Your MySQL connection id is 2
Server version: 5.1.52 Source distribution
Copyright (c) 2000, 2010, Oracle and/or its affiliates. All rights reserved.
This software comes with ABSOLUTELY NO WARRANTY. This is free software,
and you are welcome to modify and redistribute it under the GPL v2 license
Type 'help;' or '\h' for help. Type '\c' to clear the current input statement.
登録済ユーザ及びパスワードの確認
mysql> select user,host,password from mysql.user;
+------+-----------------------+----------+
| user | host                  | password |
+------+-----------------------+----------+
| root | localhost             |          | ← パスワードが設定されていない
| root | server1.yokensaka.com |          | ← パスワードが設定されていない
| root | 127.0.0.1             |          |
|      | localhost             |          |
|      | server1.yokensaka.com |          |
+------+-----------------------+----------+
5 rows in set (0.00 sec)
localhostのrootユーザにパスワードを設定
mysql> set password for root@localhost=password('パスワード');
Query OK, 0 rows affected (0.00 sec)
server1.yokensaka.comのrootユーザにパスワードを設定
mysql> set password for root@server1.yokensaka.com=password('パスワード');
Query OK, 0 rows affected (0.00 sec)
mysql> exit ← いったんログアウト
Bye
rootユーザでパスワードありでMySQLサーバーへログイン
[root@server1 ~]# mysql -u root -pパスワード
Welcome to the MySQL monitor.  Commands end with ; or \g.
Your MySQL connection id is 2
Server version: 5.1.52 Source distribution
Copyright (c) 2000, 2010, Oracle and/or its affiliates. All rights reserved.
This software comes with ABSOLUTELY NO WARRANTY. This is free software,
and you are welcome to modify and redistribute it under the GPL v2 license
Type 'help;' or '\h' for help. Type '\c' to clear the current input statement.
登録済ユーザ及びパスワードの確認
mysql> select user,host,password from mysql.user;
+------+-----------------------+-------------------------------------------+
| user | host                  | password                                  |
+------+-----------------------+-------------------------------------------+
| root | localhost             | *4202C8EE0ABB7FD2186E1CB0180B55C5272A8556 | ← パスワードが設定された
| root | server1.yokensaka.com | *4202C8EE0ABB7FD2186E1CB0180B55C5272A8556 | ← パスワードが設定された
| root | 127.0.0.1             |                                           |
|      | localhost             |                                           |
|      | server1.yokensaka.com |                                           |
+------+-----------------------+-------------------------------------------+
5 rows in set (0.00 sec)
mysql> exit ← いったんログアウト
Bye

※ドメインにハイフン(-)が入ってる場合はドメインをシングルクォーテーションで囲む
■匿名ユーザの削除
MySQLには匿名ユーザがデフォルトで登録されており、ユーザ名とパスワードなしでMySQLサーバーへログインできてしまうため、安全のためにこのユーザを削除。

rootユーザでパスワードありでMySQLサーバーへログイン
[root@server1 ~]# mysql -u root -pパスワード
Welcome to the MySQL monitor.  Commands end with ; or \g.
Your MySQL connection id is 6
Server version: 5.1.52 Source distribution
Copyright (c) 2000, 2010, Oracle and/or its affiliates. All rights reserved.
This software comes with ABSOLUTELY NO WARRANTY. This is free software,
and you are welcome to modify and redistribute it under the GPL v2 license
Type 'help;' or '\h' for help. Type '\c' to clear the current input statement.
登録ユーザの確認
mysql> select user,host from mysql.user;
+------+-----------------------+
| user | host                  |
+------+-----------------------+
| root | 127.0.0.1             |
|      | localhost             |
| root | localhost             |
|      | server1.yokensaka.com |
| root | server1.yokensaka.com |
+------+-----------------------+
5 rows in set (0.00 sec)
匿名ユーザを削除
mysql> delete from mysql.user where user='';
Query OK, 2 rows affected (0.00 sec)
匿名ユーザが削除されてるか確認
mysql> select user,host from mysql.user;
+------+-----------------------+
| user | host                  |
+------+-----------------------+
| root | 127.0.0.1             |
| root | localhost             |
| root | server1.yokensaka.com |
+------+-----------------------+
3 rows in set (0.01 sec)
mysql> exit ← いったんログアウト
Bye
匿名ユーザでMySQLサーバーへログインできないことを確認
[root@server1 ~]# mysql
ERROR 1045 (28000): Access denied for user 'root'@'localhost' (using password: NO)

■testデータベースの削除
MySQLにはデフォルトでtestという空のデータベースが登録されているが、不要のため、このデータベースを削除。

rootユーザでMySQLサーバーへログイン
[root@server1 ~]# mysql -u root -pパスワード
Welcome to the MySQL monitor.  Commands end with ; or \g.
Your MySQL connection id is 8
Server version: 5.1.52 Source distribution
Copyright (c) 2000, 2010, Oracle and/or its affiliates. All rights reserved.
This software comes with ABSOLUTELY NO WARRANTY. This is free software,
and you are welcome to modify and redistribute it under the GPL v2 license
Type 'help;' or '\h' for help. Type '\c' to clear the current input statement.
登録データベースを確認
mysql> show databases;
+--------------------+
| Database           |
+--------------------+
| information_schema |
| mysql              |
| test               |
+--------------------+
3 rows in set (0.00 sec)
testデータベースを削除
mysql> drop database test;
Query OK, 0 rows affected (0.00 sec)
testデータベースが削除されてるか確認
mysql> show databases;
+--------------------+
| Database           |
+--------------------+
| information_schema |
| mysql              |
+--------------------+
2 rows in set (0.00 sec)
mysql> exit ← ログアウト
Bye

■MySQL確認

rootでMySQLサーバーへログイン
[root@server1 ~]# mysql -u root -pパスワード
Welcome to the MySQL monitor.  Commands end with ; or \g.
Your MySQL connection id is 2
Server version: 5.1.52 Source distribution
Copyright (c) 2000, 2010, Oracle and/or its affiliates. All rights reserved.
This software comes with ABSOLUTELY NO WARRANTY. This is free software,
and you are welcome to modify and redistribute it under the GPL v2 license
Type 'help;' or '\h' for help. Type '\c' to clear the current input statement.
takaデータベースへの全てのアクセス権限を持った、新規ユーザtakaを登録
mysql> grant all privileges on taka.* to taka@localhost identified by 'パスワード';
Query OK, 0 rows affected (0.00 sec)
mysql> select user from mysql.user where user='taka'; ← takaユーザ登録確認
+--------+
| user   |
+--------+
| taka   |
+--------+
1 row in set (0.00 sec)
mysql> exit ← ログアウト
Bye
takaユーザでMySQLサーバーへログイン
[root@server1 ~]# mysql -u taka -pパスワード
Welcome to the MySQL monitor.  Commands end with ; or \g.
Your MySQL connection id is 2
Server version: 5.1.52 Source distribution
Copyright (c) 2000, 2010, Oracle and/or its affiliates. All rights reserved.
This software comes with ABSOLUTELY NO WARRANTY. This is free software,
and you are welcome to modify and redistribute it under the GPL v2 license
Type 'help;' or '\h' for help. Type '\c' to clear the current input statement.
mysql> create database taka; ← takaデータベース作成
Query OK, 1 row affected (0.00 sec)
mysql> show databases; ← データベース作成確認
+--------------------+
| Database           |
+--------------------+
| information_schema |
| taka               |
+--------------------+
2 rows in set (0.00 sec)
mysql> use taka ← takaデータベースへ接続
Database changed
mysql> create table taka(num int, name varchar(50)); ← takaテーブル作成
Query OK, 0 rows affected (0.01 sec)
mysql> show tables; ← テーブル作成確認
+----------------+
| Tables_in_test |
+----------------+
| taka           |
+----------------+
1 row in set (0.00 sec)
mysql> insert into taka values(1,'データAB'); ← takaテーブルへデータ登録
Query OK, 1 row affected (0.00 sec)
mysql> select * from taka; ← データ登録確認
+------+----------+
| num  | name     |
+------+----------+
|    1 | データAB |
+------+----------+
1 row in set (0.01 sec)
mysql> update taka set name='データAB'; ← takaテーブル内データ更新
Query OK, 1 row affected (0.00 sec)
Rows matched: 1  Changed: 0  Warnings: 0
mysql> select * from taka; ← データ更新確認
+------+----------+
| num  | name     |
+------+----------+
|    1 | データAB |
+------+----------+
1 row in set (0.00 sec)
mysql> delete from taka where num=1; ← takaテーブル内データ削除
Query OK, 1 row affected (0.02 sec)
mysql> select * from taka; ← データ削除確認
Empty set (0.00 sec)
mysql> drop table taka; ← testテーブル削除
Query OK, 0 rows affected (0.00 sec)
mysql> show tables; ← テーブル削除確認
Empty set (0.00 sec)
mysql> drop database taka; ← データベースtaka削除
Query OK, 0 rows affected (0.00 sec)
mysql> show databases; ← データベース削除確認
+--------------------+
| Database           |
+--------------------+
| information_schema |
+--------------------+
1 row in set (0.00 sec)
mysql> exit ← ログアウト
Bye
rootでMySQLサーバーへログイン
[root@server1 ~]# mysql -u root -pパスワード
Welcome to the MySQL monitor.  Commands end with ; or \g.
Your MySQL connection id is 2
Server version: 5.1.52 Source distribution
Copyright (c) 2000, 2010, Oracle and/or its affiliates. All rights reserved.
This software comes with ABSOLUTELY NO WARRANTY. This is free software,
and you are welcome to modify and redistribute it under the GPL v2 license
Type 'help;' or '\h' for help. Type '\c' to clear the current input statement.
takaユーザから全てのデータベースへのアクセス権限を剥奪
mysql> revoke all privileges on *.* from taka@localhost;
Query OK, 0 rows affected (0.00 sec)
takaユーザ削除
mysql> delete from mysql.user where user='taka' and host='localhost';
Query OK, 1 row affected (0.03 sec)
takaユーザ削除確認
mysql> select user from mysql.user where user='taka';
Empty set (0.00 sec)
mysql> flush privileges; ← takaユーザの削除をMySQLサーバーへ反映
Query OK, 0 rows affected (0.02 sec)
mysql> exit ← ログアウト
Bye

■文字セットの確認
MySQLを使ったブログ等が文字化けしたときは、以下のコマンドでサーバーが持っている文字セットとクライアントが持っている文字セットを確認できる。

[root@server1 ~]# mysql -u root -pパスワード
Welcome to the MySQL monitor.  Commands end with ; or \g.
Your MySQL connection id is 22
Server version: 5.1.52 Source distribution
Copyright (c) 2000, 2010, Oracle and/or its affiliates. All rights reserved.
This software comes with ABSOLUTELY NO WARRANTY. This is free software,
and you are welcome to modify and redistribute it under the GPL v2 license
Type 'help;' or '\h' for help. Type '\c' to clear the current input statement.
mysql> show variables like 'character\_set\_%';
+--------------------------+--------+
| Variable_name            | Value  |
+--------------------------+--------+
| character_set_client     | utf8   |
| character_set_connection | utf8   |
| character_set_database   | utf8   |
| character_set_filesystem | binary |
| character_set_results    | utf8   |
| character_set_server     | utf8   |
| character_set_system     | utf8   |
+--------------------------+--------+
7 rows in set (0.00 sec)

クライアント側の設定が反映される項目
character_set_client
character_set_connection
character_set_results
サーバー側の設定が反映される項目
character_set_database
character_set_server
■Movable Typeの初期設定
Movable Typeのブログデータを保存するデータベースの初期設定を行います。

rootでMySQLサーバーへログイン
[root@server1 ~]# mysql -u root -pパスワード
Welcome to the MySQL monitor.  Commands end with ; or \g.
Your MySQL connection id is 2
Server version: 5.1.52 Source distribution
Copyright (c) 2000, 2010, Oracle and/or its affiliates. All rights reserved.
This software comes with ABSOLUTELY NO WARRANTY. This is free software,
and you are welcome to modify and redistribute it under the GPL v2 license
Type 'help;' or '\h' for help. Type '\c' to clear the current input statement.
mysql>
「mt」というデータベースを作成
mysql> create database mt;
Query OK, 1 row affected (0.01 sec)
管理DBをデフォルト(管理をカレント)
mysql> use mysql;
Reading table information for completion of table and column names
You can turn off this feature to get a quicker startup with -A
Database changed
「mt」というデータベースにログインするユーザー名とパスワードを設定
mysql> grant usage on mt.* to higo@localhost identified by 'パスワード';
Query OK, 0 rows affected (0.00 sec)
「mt」というデータベースに対してすべての権限を「higo」に許す
mysql> grant all on mt.* to higo@localhost;
Query OK, 0 rows affected (0.00 sec)
mysql> exit ← ログアウト
Bye

POP/IMAPサーバ(Dovecot)

Postfixをインストールしただけでは、メールの読み出しは出来ない。 Postfixはメールを配信するためのSMTPサーバーとしての機能しか持たない。ここではdovecotをインストールすることにより、POP3/IMAP4どちらでもメールを読み出せるようにする。
■dovecotのインストール
dovecotは高セキュリティー性を重要視して開発されたPOP3/IMAP4サーバーソフトウェアー。

[root@server1 ~]# yum -y install dovecot

■dovecotの設定ファイルの編集
dovecotはPOP3/IMAP4どちらにも対応している。しかしインストールした時点では、IMAP4サーバーとしてしか動作できない。そこでPOP3サーバーとしてもメールが読み出せるように、設定ファイルを編集。

[root@server1 ~]# vi /etc/dovecot/dovecot.conf ← dovecot.confを開く
Protocols we want to be serving.
#protocols = imap pop3 lmtp
↓
protocols = imap pop3 lmtp ← #を外す
# Space separated list of trusted network ranges. Connections from these
# IPs are allowed to override their IP addresses and ports (for logging and
# for authentication checks). disable_plaintext_auth is also ignored for
# these networks. Typically you'd specify your IMAP proxy servers here.
#login_trusted_networks =
disable_plaintext_auth = no ← プレインテキストのパスワード認証(追記)
メールボックス格納形式をMaildir形式とする
[root@server1 ~]# vi /etc/dovecot/conf.d/10-mail.conf
#   mail_location = maildir:~/Maildir
#   mail_location = mbox:~/mail:INBOX=/var/mail/%u
#   mail_location = mbox:/var/mail/%d/%1n/%n:INDEX=/var/indexes/%d/%1n/%n
#
# <doc/wiki/MailLocation.txt>
#
#mail_location =
↓
mail_location = maildir:~/Maildir ← #を外し maildir:~/Maildirを追記

■dovecotの起動

[root@server1 ~]# /etc/rc.d/init.d/dovecot start
Dovecot Imap を起動中:                                     [  OK  ]
dovecotの自動起動設定
[root@server1 ~]# chkconfig dovecot on
dovecotの自動起動設定確認
[root@server1 ~]# chkconfig --list dovecot
dovecot         0:off   1:off   2:on    3:on    4:on    5:on    6:off
                (ランレベル2~5のonを確認)

POP/IMAPサーバを使うには、ルーターの設定が必要なので、110番(POPの場合)または143番(IMAPの場合)のポートを開ける。
■ ポートチェック【ポート開放確認】
「管理しているサーバーが外部から接続アクセスできるか?」「ポートは開放されているか?」「portは閉じているか?」「ルータのポートは開放されているか」等の
ポートチェック・ポートの疎通確認テストはこちらで
■メールアドレスの作成
メールアドレスは新しくユーザーを追加することにより作成可能だが、メールのみ使用するユーザーが telnetやsshを使える状態にしておくのは望ましいことではない。 useraddに -sオプションを付けてシェルを/sbin/nologinに設定することでログインできなくなる。
t-higoというメールアドレスを追加したい場合は、以下のコマンドを実行。

[root@server1 ~]# useradd -s /sbin/nologin t-higo

■ユーザーt-higoのパスワードを設定

[root@server1 ~]# passwd t-higo
Changing password for user t-higo.
New UNIX password: ← パスワードを入力(表示されない)
BAD PASSWORD: it is based on a (reversed) dictionary word
Retype new UNIX password: ← 再度同じパスワードを入力
passwd: all authentication tokens updated successfully.
これで以下のようなメールアドレスが使用可能となる。
メールアドレス   t-higo@yokensaka.com

■セキュリティレベルの設定
CentOSのインストールに時ファイアウォールを有効にした場合は、メールサーバーへのアクセスは出来ない。そこで、セキュリティーレベルを変更して、SMTPサーバー及びPOPサーバー、IMAPサーバーへアクセスできるようにする。 X Window Systemで起動し「アプリケーション・メニュー」から「システム設定」-「セキュリティレベル」を選択して「セキュリティレベルの設定ツール」を起動する。メールの送受信を可能にするには、「セキュリティレベル」で「ファイアウォールを有効にする」を選択し、「信頼できるサービス」の「メール(SMTP)」にチェックをし、「他のポート」に「110:tcp,110:udp,143:udp,993:tcp,993:udp,995:tcp,995:udp」と入力する。

SMTPサーバ(Postfix)

メールサーバーを構築するためには、まずメール配送を行うためのSMTPサーバーが必要となる。 SMTPサーバーとして動作するソフトウェアの代表的なものにはPostfix、sendmail、qmailがある。 Postfixはsendmailやqmailより後に開発されたため、それぞれの良い部分を反映して開発されており、簡単に設定することが可能なので、ここではsendmailとの互換性が優れているPostfixを使用する。
■Postfixのインストール

[root@server1 ~]# yum -y install postfix

■Postfixの設定
Postfixの基本的な設定は、/etc/postfix/main.cfで行う

[root@server1 ~]# vi /etc/postfix/main.cf ← viエディタでmain.cfを開く
# The myhostname parameter specifies the internet hostname of this
# mail system. The default is to use the fully-qualified domain name
# from gethostname(). $myhostname is used as a default value for many
# other configuration parameters.
#
#myhostname = host.domain.tld
↓
myhostname = server1.yokensaka.com ← #を外して、サーバーのホスト名を設定
#myhostname = virtual.domain.tld
# The mydomain parameter specifies the local internet domain name.
# The default is to use $myhostname minus the first component.
# $mydomain is used as a default value for many other configuration
# parameters.
#
#mydomain = domain.tld
↓
mydomain = yokensaka.com ← #を外して、ドメイン名を設定
# For the sake of consistency between sender and recipient addresses,
# myorigin also specifies the default domain name that is appended
# to recipient addresses that have no @domain part.
#
#myorigin = $myhostname
#myorigin = $mydomain
↓
myorigin = $mydomain ← #を外して、設定を有効に
      (メールアドレスの「@」以下に付加する文字列を指定)
# See also the proxy_interfaces parameter, for network addresses that
# are forwarded to us via a proxy or network address translator.
#
# Note: you need to stop/start Postfix when this parameter changes.
#
メールの受信を許可するネットワークインターフェースを設定
#inet_interfaces = all
↓ #を外して、設定を有効にする(自サーバーからのメールだけを受信する場合は設定しない)
inet_interfaces = all
#inet_interfaces = $myhostname
#inet_interfaces = $myhostname, localhost
inet_interfaces = localhost
↓ 行頭に#を追加(自サーバーからのメールだけを受信する場合は設定しない)
#inet_interfaces = localhost
# Specify a list of host or domain names, /file/name or type:table
# patterns, separated by commas and/or whitespace. A /file/name
# pattern is replaced by its contents; a type:table is matched when
# a name matches a lookup key (the right-hand side is ignored).
# Continue long lines by starting the next line with whitespace.
#
# See also below, section "REJECTING MAIL FOR UNKNOWN LOCAL USERS".
#
受信したメールを拒否するかどうかを設定
mydestination = $myhostname, localhost.$mydomain, localhost
↓
#mydestination = $myhostname, localhost.$mydomain, localhost ← 行頭に#を追加
#mydestination = $myhostname, localhost.$mydomain, localhost, $mydomain
↓
mydestination = $myhostname, localhost.$mydomain, localhost, $mydomain ← #を外す
#mydestination = $myhostname, localhost.$mydomain, localhost, $mydomain,
#       mail.$mydomain, www.$mydomain, ftp.$mydomain
# Specify "mynetworks_style = host" when Postfix should "trust"
# only the local machine.
#
#mynetworks_style = class
#mynetworks_style = subnet
↓
mynetworks_style = subnet ← #を外す
#mynetworks_style = host
# You can also specify the absolute pathname of a pattern file instead
# of listing the patterns here. Specify type:table for table-based lookups
# (the value on the table right-hand side is not used).
#
内部ネットワークアドレスとローカルホストアドレスを指定
#mynetworks = 168.100.189.0/28, 127.0.0.0/8
↓
mynetworks = 192.168.1.0/24, 127.0.0.0/8 ← #を外して書き換える
#mynetworks = $config_directory/mynetworks
#mynetworks = hash:/etc/postfix/network_table
# NOTE: Postfix will not automatically forward mail for domains that
# list this system as their primary or backup MX host. See the
# permit_mx_backup restriction description in postconf(5).
#
#relay_domains = $mydestination
↓
relay_domains = $mydestination ← #を外す
# DELIVERY TO MAILBOX
#
# The home_mailbox parameter specifies the optional pathname of a
# mailbox file relative to a user's home directory. The default
# mailbox file is /var/spool/mail/user or /var/mail/user.  Specify
# "Maildir/" for qmail-style delivery (the / is required).
#
#home_mailbox = Mailbox
#home_mailbox = Maildir/
↓
home_mailbox = Maildir/ ← #を外してメールボックス格納形式をMaildir形式にする
SMTP Authを有効にする。設定ファイルの最終行まで移動して、以下のように設定を追記。
smtpd_sasl_auth_enable = yes
smtpd_sasl_local_domain = $myhostname
smtpd_recipient_restrictions = permit_mynetworks, permit_sasl_authenticated, reject_unauth_destination
送信するメール1通当たりのサイズはデフォルトで10MByte、
受信するメール合計の総容量はデフォルトで50MByteに設定されている。
それぞれ5倍の50MByteと250MByteに変更するには以下を最終行へ追加。
message_size_limit = 52428800 ← 1024*1024*50=52428800
mailbox_size_limit = 262144000 ← 1024*1024*250=262144000
変更を有効にする為、postfixを再起動。
[root@server ~]# /etc/rc.d/init.d/postfix reload
postfix を再読み込み中:                                    [  OK  ]

■SMTP Auth設定
SMTP AuthではCyrus SASLと呼ばれる認証プログラムを利用している。 PostfixでCyrus SASLを利用出来るように設定する必要がある。

[root@server1 ~]# vi /etc/sasl2/smtpd.conf ← smtpd.confを開く
設定ファイルの最後に追記
mech_list: plain login cram-md5 digest-md5
saslauthdの起動
[root@server1 ~]# /etc/init.d/saslauthd start
saslauthd を起動中:                                        [  OK  ]
saslauthdの自動起動設定
[root@server1 ~]# chkconfig saslauthd on
saslauthdの自動起動設定確認
[root@server1 ~]# chkconfig --list saslauthd
saslauthd       0:off   1:off   2:on    3:on    4:on    5:on    6:off
                (ランレベル2~5のonを確認)

■root宛メールを一般ユーザ(webmaster)へ転送
システムからroot宛に送られてくるメールを、一般ユーザ(webmaster)へ転送するようにする。

管理者ユーザ宛メールのroot宛転送設定を解除
[root@server1 ~]# sed -i 's/^webmaster/#webmaster/g' /etc/aliases
管理者ユーザ宛メールのroot宛転送設定解除を確認
[root@server1 ~]# grep ^webmaster /etc/aliases ← 結果がなにも表示されないことを確認
root宛メールを管理者ユーザ(webmaster)へ転送するように設定
[root@server1 ~]# sed -i 's/^root/#root/g' /etc/aliases
root宛メールを管理者ユーザ(webmaster)へ転送するように設定
[root@server1 ~]# echo "root: webmaster" >> /etc/aliases
root宛メールが管理者ユーザ(webmaster)宛へ転送されるかの確認
[root@server1 ~]# grep ^root /etc/aliases
root: webmaster ← root宛メールが管理者ユーザ(webmaster)へ転送されるように設定されている
転送先を反映させる
[root@server1 ~]# postalias /etc/aliases

■一般ユーザー(webmaster)の作成
webmasterへメールが届くようにするためには一般ユーザー(webmaster)の作成が必要。

一般ユーザ(webmaster)を追加。
[root@server1 ~]# useradd webmaster
一般ユーザーでログインするためにはパスワードを設定する必要がある
[root@server1 ~]# passwd webmaster
パスワードの入力(入力したパスワードは表示されない)
[root@server1 ~]# passwd webmaster
ユーザー webmaster のパスワードを変更。
新しいパスワード: ← パスワード
再入力を促されるので、もう一度入力。(上記のパスワードと同じ物を入れる)
新しいパスワードを再入力してください: ← パスワード
passwd: 全ての認証トークンが正しく更新できました。

■Postfixの起動

Postfixの起動
[root@server1 ~]# /etc/rc.d/init.d/postfix restart
postfix を停止中:                                          [  OK  ]
postfix を起動中:                                          [  OK  ]

■Postfixの自動起動設定

Postfixの自動起動設定
[root@server1 ~]# chkconfig postfix on
Postfixの自動起動設定確認
[root@server1 ~]# chkconfig --list postfix
postfix         0:off   1:off   2:on    3:on    4:on    5:on    6:off
                (ランレベル2~5のonを確認)

■sendmailパスの確認
掲示板などで投稿があったらメール通知する設定をしている時は CGIのsendmailパスの設定を変更しないと送信エラーになる場合がある。

一般ユーザーでsendmailパスの確認をする
[root@server1 ~]# su - higo
[higo@server1 ~]$ which sendmail ← sendmailパスの確認
/usr/bin/which: no sendmail in (/usr/kerberos/bin:/usr/local/bin:/bin:/usr/bin:/home/higo/bin)
sendmailパスが見つからないときは
以下のようにすれば一般ユーザーでもsendmailパスがみえるようになる。
[higo@server1 ~]$ su - ← ルートになる
パスワード(P): ← ルートのパスワードを入力
[root@server1 ~]# ln -s /usr/sbin/sendmail /usr/bin/sendmail
[root@server1 ~]# su - higo ← 一般ユーザーになる
[higo@server1 ~]$ which sendmail ← sendmailパスの確認
/usr/bin/sendmail

joyful.cgiではsendmailパスがデフォルトで「/usr/lib/sendmail」になっているので、上記で確認したsendmailパス「/usr/bin/sendmail」に直さないと投稿時に送信エラーになる。

# sendmailパス(メール通知する時)
$sendmail = '/usr/lib/sendmail';
 ↓
# sendmailパス(メール通知する時)
$sendmail = '/usr/bin/sendmail'; ← libをbinに変更

root宛のメールを一般ユーザーへ転送してない場合、rootのメールが肥大化していくので注意が必要。そんな時は手動でroot宛のメールを削除する。
メール容量を確認

[root@server1 ~]# ls -la /var/spool/mail/
合計 16
drwxrwxr-x.  2 root   mail 4096  1月 17 18:41 2013 .
drwxr-xr-x. 14 root   root 4096  9月 23 20:47 2011 ..
-rw-rw----   1 clamav mail    0  9月 30 22:44 2011 clamav
-rw-rw----.  1 higo   mail    0  9月 30 20:10 2011 higo
-rw-------   1 root   mail 11710847  1月 17 18:14 2013 root
-rw-rw----.  1 rpc    mail    0  9月 30 19:53 2011 rpc
root宛のメールを削除
[root@server1 ~]# cat /dev/null > /var/mail/root
再度メール容量を確認
[root@server1 ~]# ls -la /var/spool/mail/
合計 8
drwxrwxr-x.  2 root   mail 4096  1月 17 18:41 2013 .
drwxr-xr-x. 14 root   root 4096  9月 23 20:47 2011 ..
-rw-rw----   1 clamav mail    0  9月 30 22:44 2011 clamav
-rw-rw----.  1 higo   mail    0  9月 30 20:10 2011 higo
-rw-------   1 root   mail    0  1月 17 19:45 2013 root
-rw-rw----.  1 rpc    mail    0  9月 30 19:53 2011 rpc

サーバー管理のレポート送信先を変更
ファイルの末尾の記述を以下のように修正

[root@server1 ~]# vi /etc/aliases
# Person who should get root's mail
#root:     marc
 ↓
root:           ****@******.co.jp ← #を外して送信先メールアドレスを記述
転送先を反映させる
[root@server1 ~]# postalias /etc/aliases

※SMTPサーバーを使うには、ルーターの設定が必要なので25番のポートを開ける。
■ ポートチェック【ポート開放確認】
「管理しているサーバーが外部から接続アクセスできるか?」「ポートは開放されているか?」「portは閉じているか?」「ルータのポートは開放されているか」等の
ポートチェック・ポートの疎通確認テストはこちらで
Postfixをインストールしただけでは、メールの読み出しは出来ない。 Postfixはメールを配信するためのSMTPサーバーとしての機能しか持たないので、dovecotをインストールすることにより、POP3/IMAP4どちらでもメールを読み出せるようにする。

MySQL管理(phpMyAdmin)

phpMyAdminはWebブラウザからMySQLデータベースを管理するためのPHPで記述されたソフトウェア。WebブラウザからMySQLのテーブル操作、インポート・エクスポートすることが出来る。
■ phpMyAdminインストール
こちらで最新版 を確認すること
(最新版を確認してダウロード 11/09/19 時点では phpMyAdmin 3.4.5)

[root@server1 ~]# wget http://prdownloads.sourceforge.net/phpmyadmin/phpMyAdmin-3.4.5-all-languages.tar.bz2
ダウンロードしたphpMyAdminを展開
[root@server1 ~]# tar jxvf phpMyAdmin-3.4.5-all-languages.tar.bz2
古いphpMyAdminを削除
[root@server1 ~]# rm -rf /var/www/phpmyadmin
phpMyAdmin展開先ディレクトリを所定の場所へコピー
[root@server1 ~]# mv phpMyAdmin-3.4.5-all-languages/ /var/www/phpmyadmin
ダウンロードしたphpMyAdminを削除
[root@server1 ~]# rm -f phpMyAdmin-3.4.5-all-languages.tar.bz2

■ php-mysqlインストール
phpMyAdminはPHPで動作するため、PHPからMySQLデータベースへアクセスするためのパッケージ「php-mysql」をインストールする

[root@server1 ~]# yum -y install php-mysql

■ mbstringモジュールインストール
phpMyAdmin は mbstring 拡張なしでは文字列を正確に分割することができないのでmbstringモジュールをインストールする

[root@server1 ~]# yum -y install php-mbstring

■ phpMyAdmin設定

phpmyadmin/config.sample.inc.phpを名前変更して/var/www/phpmyadmin/の直下にコピー
[root@server1 ~]# cp -p /var/www/phpmyadmin/config.sample.inc.php /var/www/phpmyadmin/config.inc.php
設定ファイルのパーミッションを変更
[root@server1 ~]# chmod 660 /var/www/phpmyadmin/config.inc.php
設定ファイル編集
[root@server1 ~]# vi /var/www/phpmyadmin/config.inc.php
* This is needed for cookie based authentication to encrypt password in
* cookie
*/
$cfg['blowfish_secret'] = ''; /* YOU MUST FILL IN THIS FOR COOKIE AUTH! */
↓
$cfg['blowfish_secret'] = '***********'; /* YOU MUST FILL IN THIS FOR COOKIE AUTH! */ ← 46文字以内の適当な文字列を指定
※上記はロiグイン時のパスワード暗号化の際に内部的に利用されるパスフレーズであり、ユーザに入力要求されるものではない
phpMyAdminの所有者を変更
[root@server1 ~]# chown -R root.apache /var/www/phpmyadmin/

■ Apache設定
phpMyAdmin用Apache設定ファイル作成

内部と特定の外部IPからのみアクセスできるように指定する
[root@server1 ~]# vi /etc/httpd/conf.d/phpmyadmin.conf
Alias /phpmyadmin /var/www/phpmyadmin
<Location /phpmyadmin>
Order deny,allow
Deny from all
Allow from 127.0.0.1 ← サーバー自身からのアクセスを許可
Allow from 192.168.1. ← 内部ネットワークからのアクセスを許可
Allow from xxx.xxx.xxx.xxx ← 特定の外部IP(xxx.xxx.xxx.xxx)からのアクセスを許可
</Location>
[root@server1 ~]# /etc/rc.d/init.d/httpd restart ← Apache設定反映
httpd を停止中:                                            [  OK  ]
httpd を起動中:                                            [  OK  ]

会社等からアクセスする場合、自分の会社の接続環境(IPアドレス)を調べ、/etc/hosts.allowへ登録する必要がある。そんな時は診断くんで確認できる。
■ phpMyAdmin確認
http://サーバー名/phpmyadmin/へアクセスして、phpMyAdminのログイン画面が表示されること
MySQLに登録されているアカウントでログインできること
http://サーバー名/phpmyadmin/へアクセスしてみると
※「mcrypt 拡張がありません。PHP の設定をチェックしてみてください。」というエラーメッセージが出たので、 php-mcryptをインストール。
■ php-mcryptをインストール

[root@server1 ~]# yum install php-mcrypt

■ Apacheの再起動

[root@server1 ~]# /etc/rc.d/init.d/httpd restart

■ PHP の初期設定の変更
リストアで利用できるバックアップデータの最大サイズは2,048KB と書かれているとおり、 デフォルト では2 MB になっている。これはphpMyAdminの制限ではなく、 PHP の初期設定での制限。 これを変更するには、 “/etc/php.ini” を開き、 “upload_max_filesize” ディレクティブ を修正。
/etc/php.iniを cp コマンドでバックアップを作成してから作業するようにする。

[root@server1 ~]# cp -p /etc/php.ini /etc/php.ini.org
[root@server1 ~]# vi /etc/php.ini
;;;;;;;;;;;;;;;;
; File Uploads ;
;;;;;;;;;;;;;;;;
; Whether to allow HTTP file uploads.
file_uploads = On
; Temporary directory for HTTP uploaded files (will use system default if not
; specified).
;upload_tmp_dir =
; Maximum allowed size for uploaded files.
upload_max_filesize = 2M
↓
upload_max_filesize = 30M ← 30Mに変更

CentOS 6.0 のインストール

■ CentOS 6.0 の取得
CentOSをhttp://www.centos.org/より取得
2種類あるので目的に合ったものをダウンロード
Direct Download
i386 – http://mirror.centos.org/centos/6/isos/i386/
x86_64 – http://mirror.centos.org/centos/6/isos/x86_64/
あにょはhttp://ftp.riken.jp/Linux/centos/6.0/isos/i386/ からhttp://ftp.riken.jp/Linux/centos/6.0/isos/i386/CentOS-6.0-i386-bin-DVD.isoをダウンロード。ダウンロードしたファイルは、ISOイメージファイルなので、別途DVD-Writerソフト等でDVD-Rに焼いて準備しておく。(ちなみにあにょはドライブに付属していたNero Express Essentialsというライティングソフトを使っている。メディアをセットしてisoファイルをダブルクリックするとNeroが起動、あとは「書き込み」ボタンをクリックするだけでisoイメージファイルが焼ける)
※2011年9月18日現在(CentOS-6.0-i386-bin-DVD.iso)
Release Notesは以下のサイト
CentOS – http://wiki.centos.org/Manuals/ReleaseNotes/CentOS6.0/Japanese
■ CentOS 6.0 のインストール
1.インストーラーの起動
CentOS 5 のインストールDVDをDVD-ドライブに挿入し、電源を入れる。
※BIOSの設定で1番最初にDVDからブートできるようになっている必要である。
20111001-1
[Install or upgrade an existing system] を選択して[Enter]キーを押す。
画面が真っ黒でインストールが進まない場合は、video driverが対応してないので
[Install system with basic video driver] でインストール作業をすすめる。
2.メディアのテスト(Disk Found)
20111001-2
[Skip] を選び、[Enter]キーを押す。
3.CentOS のGUIが立ち上がるので
20111001-3
[Next] ボタンをクリック。
4.言語の設定
インストール作業中に使用する言語の選択
20111001-4
「Japanese(日本語)」 を選び、[Next] ボタンをクリック。
実際にシステムを使用するときの言語選択に関しては、後で設定を行う。
5.キーボードの設定
20111001-5
106日本語キーボードを使っている場合は、「日本語」を選択して、[次]ボタンをクリック。
6.インストールデバイスの選択
20111001-6
基本ストレージデバイス(通常のHDD)を選択して[次]ボタンをクリック。
20111001-6_
未初期化HDDなど初期化が必要な場合のメッセージ。初期化しても問題なければ「全てを再初期化(T)」をクリック。
7.ホスト名、ネットワークの設定
20111001-7
ホスト名に「server.yokensaka.com」と入力。(先頭がホスト名、後ろはドメイン名)
ホスト名の入力が済んだら「ネットワークの設定」をクリック。
8.ネットワーク接続 の設定
20111001-8
System eth0 を選択して 編集… ボタンをクリック。
9.System eth0 の編集
20111001-9
IPv4のセッティングタブをクリック。
・自動接続するにチェック
・方式:手動を選択
・アドレスの項目で追加をクリック
アドレス → 192.168.1.4
ネットマスク → 24
ゲートウェイ → 192.168.1.1
・DNSサーバー → 192.168.1.1
DNSは通常サーバー自身をDNSサーバーとして設定するときにサーバー自身に割り当てた 192.168.1.4 をDNSサーバーアドレスとして設定。 しかし、ここで 192.168.1.4 に設定するとインターネットに繋がらなくなり、wgetによるダウンロードができなくなる為、この段階では1番目のDNSは 192.168.1.1 とする。
10.タイムゾーンの選択
20111001-10
アジア/東京 を選択
システムクロックでUTCを使用のチェックをはずして [次] をクリック
11.Rootパスワードを設定
20111001-11
スーパーユーザ(Root)のパスワードを入力。確認の為にもう一回同じパスワードを入力。
入力したら [次] をクリック
注意 : このパスワードは絶対に忘れない様に! 何もできなくなってしまう。
パスワードが弱すぎる場合はメーッセージが表示される。
20111001-12
12.ディスクパーティション設定
20111001-13
ソフトウェアRAIDで構築するので「カスタムレイアウトを作成する」を選択して「次」をクリック。
(RAIDで構築しないのであれば、「すべての領域を使用する」を選択して「次」をクリック)
13.RAIDインストールするストレージデバイスの選択
20111001-14
繋がれてるHDDが左側に表示されるので、RAIDインストールするHDDを選択して右側に移動。
20111001-15
設定が終わったら「次」ボタンをクリック。
14.既存パーティションの削除
20111001-16
HDD上に残ってる古いパーテーションは一つ一つ選択して削除しておく。
20111001-17
削除の確認メッセージが表示されるので「削除」ボタンをクリック。
20111001-18
最終的にはパーティション設定画面の状態にする。
15./boot用RAIDパーティション作成
20111001-19
パーテーション設定画面で「作成」をクリックして「RAIDパーテーション」にチェックを入れ、「作成」ボタンをクリック。
20111001-20
・ファイルシステムタイプ:software RAID になってることを確認
・使用可能なドライブ:sda にチェックを入れ sdb のチェックを外す
・サイズ:300に変更
・追加容量オプションは「固定容量」にチェックが入ってることを確認
・「基本パーテーションにする」にチェックを入れる
設定が終わったら「OK」をクリック。
すると、sda にRAIDパーティション sda1 が追加される。
20111001-21
次に sda1 パーティションのペアとなるパーティションを、 sdb 上にも確保する。
20111001-22
パーテーション設定画面で「作成」をクリックして「RAIDパーテーション」にチェックを入れ、「作成」ボタンをクリック。
20111001-23
・ファイルシステムタイプ:software RAID になってることを確認
・使用可能なドライブ:sda のチェックを外し sdb にチェックを入れる
・サイズ:300に変更
・追加容量オプションは「固定容量」にチェックが入ってることを確認
・「基本パーテーションにする」にチェックを入れる
設定が終わったら「OK」をクリック。
以下のように sdb にもRAIDパーティション sdb1 が追加される。
20111001-24
16.次にLVM用RAIDパーティション作成
20111001-25
パーテーション設定画面で「作成」をクリックして「RAIDパーテーション」にチェックを入れ、「作成」ボタンをクリック。
20111001-26
・ファイルシステムタイプ:software RAID になってることを確認
・使用可能なドライブ:sda にチェックを入れ sdb のチェックを外す
・サイズ:200(デフォルトのまま)
・追加容量オプションは「最大許容量まで使用」にチェックを入れる
設定が終わったら「OK」をクリック。
すると、sda にRAIDパーティション sda2 が追加される。
20111001-27
次に sda2 パーティションのペアとなるパーティションを、 sdb 上にも確保する。
20111001-28
パーテーション設定画面で「作成」をクリックして「RAIDパーテーション」にチェックを入れ、「作成」ボタンをクリック。
20111001-29
・ファイルシステムタイプ:software RAID になってることを確認
・使用可能なドライブ:sda のチェックを外し sdb にチェックを入れる
・サイズ:200(デフォルトのまま)
・追加容量オプションは「最大許容量まで使用」にチェックを入れる
設定が終わったら「OK」をクリック。
すると、sdb にRAIDパーティション sdb2 が追加される。
20111001-30
17./boot用RAIDデバイス作成
20111001-31
パーテーション設定画面で「作成」をクリックして「RAIDデバイス」にチェックを入れ、「作成」ボタンをクリック。
20111001-32
・マウスポイント:/bootを選択
・ファイルシステムタイプ:ext4
・RAIDデバイス:md1 を選択(sda1、sdb1と数字を合わせたほうがわかりやすい)
・RAIDレベル:RAID1
・RAIDメンバー:sda1、sdb1にチェックを入れる
・暗号化にはチェックを入れない
設定が終わったら「OK」をクリック。
すると、以下のようにRAID1構成の /boot パーティションが作成される。
20111001-33
18.LVM用RAIDデバイス作成
20111001-34
パーテーション設定画面で「作成」をクリックして「RAIDデバイス」にチェックを入れ、「作成」ボタンをクリック。
20111001-35
・ファイルシステムタイプ:physical volume(LVM)を選択
・RAIDデバイス:md2 を選択(sda2、sdb2と数字を合わせたほうがわかりやすい)
・RAIDレベル:RAID1
・RAIDメンバー:sda2、sdb2にチェックを入れる
・暗号化にはチェックを入れない
設定が終わったら「OK」をクリック。
すると、以下のようにLVM用RAIDデバイスが作成される。
20111001-36
19.ボリュームグループ作成
20111001-37
パーテーション設定画面で「作成」をクリックして「LVMボリュームグループ」にチェックを入れ、「作成」ボタンをクリック。
20111001-38
swap用論理ボリューム作成、「追加」をクリック
20111001-39
・ファイルシステムタイプ:swapを選択
・倫理ボリューム名:LogVoloo
・サイズ:2000に変更(物理メモリの2倍の数値を入力して)
・暗号化にはチェックを入れない
設定が終わったら「OK」をクリック。
すると、以下のようにswap用論理ボリュームが作成される。
20111001-40
20./ルート用論理ボリューム作成
20111001-41
パーテーション設定画面で「作成」をクリックして「LVMボリュームグループ」にチェックを入れ、「作成」ボタンをクリック。
20111001-42
ルート用論理ボリューム作成、「追加」をクリック
20111001-43
・マウスポイント:/を選択
・ファイルシステムタイプ:ext4
・倫理ボリューム名:LogVolo1
・サイズ:最大サイズ
・暗号化にはチェックを入れない
設定が終わったら「OK」をクリック。
すると、以下のようにルート用論理ボリュームが作成され、Disk Druid の画面は次のようになっている。
20111001-44
21.フォーマット
全てのパーティションの設定を確認したら「次」ボタンをクリック。すると以下のようにフォーマット確認画面が表示される。
20111001-45
「変更をディスクに書き込む」をクリックするとフォーマットが始まる。
20111001-46
22.ブートローダインストール
20111001-47
「次」をクリックしてインストールパッケージ選択へ進む
23.インストールパッケージ選択
20111001-48
Minimal Desktop を選択して「今すぐカスタマイズ」にチェックを入れ、「次」をクリック
ベースシステム:デフォルト
20111001-49
サーバー:デフォルト
20111001-50
Webサービス:デフォルト
20111001-51
データベース:デフォルト
20111001-52
システム管理:デフォルト
20111001-53
仮想化:デフォルト
20111001-54
デスクトップ:デフォルト
20111001-55
アプリケーション:デフォルト
20111001-56
開発:その他の開発と開発ツールにチェックを入れる
20111001-57
レジリエントストレージ:デフォルト
20111001-58
高可用性:デフォルト
20111001-59
ロードバランサー:デフォルト
20111001-60
Optional:デフォルト
20111001-61
言語:デフォルト
20111001-62
「次」をクリックするとインストールが始まる
24.パッケージインストール
20111001-63
パッケージインストール完了
20111001-64
「再起動」をクリックすると本体が再起動してようこそ画面が表示される。
24.基本設定
ようこそ画面(インストール後、初めての起動時のみ)
20111001-64_
「進む」をクリック
ライセンス情報
20111001-65
はい、ライセンス同意書に同意しますが選択されてるの確認して「進む」をクリック
ユーザーの作成
20111001-66
CentOS5.0まではユーザー作成はスキップできたが、CentOS6.0では必須の設定となっている。ユーザー名とパスワードを入力して「進む」をクリック
日付と時刻
20111001-67
「ネットワーク上で日付と時刻を同期化します」のチェックは外すして「進む」をクリック
kdump
20111001-68
メモリーが4GB以下だと出てくるメーッセージなので「OK」をクリックして次へ進む
20111001-69
「終了」をクリックしてインストールを完了させる。
ログイン画面が現れるので、ログインしてインストール後の設定に進む。

NucleusCMS_3.64_Upgrade

NucleusCMS_3.62からNucleusCMS_3.64にバージョンアップしてたので早速アップグレードしてみた。NucleusCMS_3.62の時もそうだったが、やはりいくつかのNucleusが文字化けしてしまう。最近インストールしたNucleusは文字化けしないが、以前から使ってるものがアップグレードすると全て文字化けしてしまう。
前回の時もそうだったが、globalfunctions.php のMySQLの「CHARSET」が怪しい。NucleusCMS_3.62の globalfunctions.phpとNucleusCMS_3.64の globalfunctions.phpでは記述が少し変わってるので、今回は(405行目)をコメントアウトして文字化けを回避することにした。
/var/www/html/centos/nucleus/libs/globalfunctions.phpの405行目をコメントアウト

sql_set_charset_jp(_CHARSET);
↓
# sql_set_charset_jp(_CHARSET);

ちなみにサーバーの文字セットを確認するには次のコマンドで確認できる。

[root@server1 ~]# echo $LANG
ja_JP.UTF-8

Nucleus 3.62 検索で引っかからない

新規にNucleus 3.62をインストールすると検索に引っかからない語句が結構あった。原因を調べてみると、Nucleus 3.62をインストールするときに、使用する言語を「EUC-JP」にしてインストールした場合、検索に引っかからない語句が結構ある。今まではこの設定でいくつものブログを作ってきたが、特に問題は発生してなかった。使用する語句を「UTF-8」でインストールすると、検索に引っかからない語句があるという問題は発生しない。サーバー(CentOS5)側の文字セットがEUCなので、なんの疑いもなしに「EUC-JP」でインストールしてたが、これからは、Nucleus 3.62もUTF-8を推奨してるように、UTF-8が標準になっていくのだろう。やがてはサーバーもUTF-8にして統一をはかろうと思うが、それはそれで色々と問題が発生しそうだ。

Nucleus 3.62 文字化け

1月にNucleus 3.51にバージョンアップしたばかりだったが、先日、バージョン3.62 日本語版のリリースがあった。日本語などのマルチバイト文字をなるべく正しく処理出来るような追加がされたようだが、今までは文字化けしてなかったのに、バージョンアップしたら文字化けするようになった。
こんな感じに文字化けした。
20110212-ws000003.jpg
色々調べたらどうも globalfunctions.php のMySQLの「CHARSET」に関するところが怪しい。とりあえず、その部分(403行目~438行目)をコメントアウトして文字化けを回避することにした。

/*
* for preventing I/O strings from auto-detecting the charactor encodings by MySQL
* since 3.62_beta-jp
* Jan.20, 2011 by kotorisan and cacher
* refering to their conversation below,
* http://japan.nucleuscms.org/bb/viewtopic.php?p=26581
*
* NOTE: 	shift_jis is only supported for output. Using shift_jis in DB is prohibited.
* NOTE:	iso-8859-x,windows-125x if _CHARSET is unset.
*/
/*  ← コメントアウト(ここから)
if (in_array('mysql',$MYSQL_HANDLER)) {
switch(strtolower(_CHARSET)){
case 'utf-8':
$charset = 'utf8';
break;
case 'euc-jp':
$charset = 'ujis';
break;
case 'gb2312':
$charset = 'gb2312';
break;
case 'shift_jis':
$charset = 'sjis';
break;
default:
$resource = sql_query("show variables LIKE 'character_set_database'");
$fetchDat = sql_fetch_assoc($resource);
$charset  = $fetchDat['Value'];
break;
}
$mySqlVer = implode('.', array_map('intval', explode('.', sql_get_server_info($MYSQL_CONN))));
if ($mySqlVer >= '5.0.7' && function_exists('mysql_set_charset')) {
mysql_set_charset($charset);
} elseif ($mySqlVer >= '4.1.0') {
sql_query("SET CHARACTER SET " . $charset);
}
}
*/ ← コメントアウト(ここまで)

Nucleus 3.51 にバージョンアップ

Nucleus バージョン3.51 日本語版が1年半ぶりにリリースされたので、自宅サーバにインストールされてるいくつかのサイトもバージョンアップすることにした。
作業手順
■ Nucleus バージョン3.51 日本語版をダウンロード

■ 既存データベースのバックアップ

  • 管理画面にログイン、「サイト管理」から「DB保存/復元」を選択
  • 「圧縮する」を選択、「バックアップを作成する」を選択して、保存

■ アップグレードスクリプトを実行

  • ダウンロードしたファイルの中の「upgrades」というフォルダをフォルダごとサーバにアップ
    アップする場所は、「・・・・/nucleus」というディレクトリの中
  • ブラウザから「・・・・/nucleus/upgrades/index.php」へアクセスして、ログイン
    表示されるウェブページに従い、アップグレード操作を実行(一瞬で終わる)
  • アップグレード後にアップした「upgrades」をフォルダごと削除

■ バージョン3.51に合わせてデータベースの内容を変更

  • ダウンロードしたファイルの「overwrites」の中にあるフォルダとかファイルをそっくりサーバにアップ
  • アップする場所は Nucleus の階層構造を変更してなければ、階層構造のとおりに上書きアップ

※元々のコアファイルを変更してたら、最新のコアファイルを変更して終了
今まではカテゴリーの名前の前に<01>という風に番号をつけて、<01>が表示されないようにコアファイルを書き換えて並び替えしてたが、コアファイルを新たに書き換えるのが面倒なので、スキンの「sidemenu.php」に直にカテゴリー名を書いて表示するようにした。最初からこの方法でやってたら楽だったのに、nucleus使い始めた頃は思いつかなかった。(^_^;)

エディタに機能ボタンを追加

Nucleusのエディタに機能ボタンを追加する方法については、nakahara21.comweb関連tips備忘録でいろいろ紹介されているのでこのブログにもちょっとアレンジしてボタンを追加してみる。
Nucleusのエディタに以下の5つの機能ボタンを追加。
・選択範囲を<pre><%nobr%>~<%/nobr%></pre>’で囲むボタン
・特殊文字を変換(<、>、& を &lt;、&gt;、&amp; に変換)するボタン
・リスト形式、番号付きリスト形式、見出しリスト形式のボタン
編集するのは下の3つ (Nucleus CMS v3.41)
 ・nucleus/javascript/edit.js
 ・nucleus/libs/PAGEFACTORY.php
 ・nucleus/language/japanese-euc.php (utf8の場合はjapanese-utf8.php)
 
まずはnucleus/javascript/edit.jsから

function italicThis() { insertAroundCaret('<i>','</i>'); }
の下に、以下の2行を挿入する。
function preThis() { insertAroundCaret('<pre><%nobr%>','<%/nobr%></pre>'); }
function entitiesThis() { entitiesCaret(); }

次に

/* some methods to get things working in Mozilla as well */
の上に以下の関数を挿入する。
function entitiesCaret () {
var textEl = lastSelected;
if (textEl && textEl.createTextRange && lastCaretPos) {
var caretPos = lastCaretPos;
caretPos.text = caretPos.text.replace(/&/g, '&amp;').replace(/</g, '&lt;').replace(/>/g, '&gt;').replace(/\"/g, '&quot;').replace(/'/g, '&#039;');
} else if (!document.all && document.getElementById) {
newText = mozSelectedText().replace(/&/g, '&amp;').replace(/</g, '&lt;').replace(/>/g, '&gt;').replace(/\"/g, '&quot;').replace(/'/g, '&#039;');
mozReplace(document.getElementById('input' + nonie_FormType), newText);
}
updAllPreviews();
}

次に、下記のコードを最後尾に追加。

function ullistThis() { insertAroundCaret('<ul><li></li>\n<li></li>\n<li></li>\n<li></li>','</ul>\n'); }
function nolistThis() { insertAroundCaret('<ol><li></li>\n<li></li>\n<li></li>\n<li></li>','</ol>\n'); }
function dllistThis() { insertAroundCaret('<dl><dt></dt>\n<dd></dd>\n<dt></dt>\n<dd></dd>','</dl>\n'); }

今度はnucleus/libs/PAGEFACTORY.php

 case "0":の
$this->_jsbutton('bold',"boldThis()",_ADD_BOLD_TT ." (Ctrl + Shift + B)");
の上に、以下の5行を挿入する。
$this->_jsbutton('pre',"preThis()",_ADD_PRE_TT);
$this->_jsbutton('entities',"entitiesThis()",_ADD_ENTITIES_TT);
$this->_jsbutton('ullist',"ullistThis()",_ADD_ULLIST_TT);
$this->_jsbutton('nolist',"nolistThis()",_ADD_NOLIST_TT);
$this->_jsbutton('dtlist',"dllistThis()",_ADD_DLLIST_TT);

次に

 case "2":の
$this->_jsbutton('alignleft',"alignleftThis()",_ADD_ALIGNLEFT_TT);
の上に、以下の5行を挿入する。
$this->_jsbutton('pre',"preThis()",_ADD_PRE_TT);
$this->_jsbutton('entities',"entitiesThis()",_ADD_ENTITIES_TT);
$this->_jsbutton('ullist',"ullistThis()",_ADD_ULLIST_TT);
$this->_jsbutton('nolist',"nolistThis()",_ADD_NOLIST_TT);
$this->_jsbutton('dtlist',"dllistThis()",_ADD_DLLIST_TT);

次にnucleus/language/japanese-euc.phpの編集

 // tooltips on toolbar
define('_ADD_ALIGNLEFT_TT',		       '左寄せ');
define('_ADD_ALIGNRIGHT_TT',		'右寄せ');
define('_ADD_ALIGNCENTER_TT',		'中央寄せ');
この下に以下を追加
define('_ADD_PRE_TT',		'<PRE>');
define('_ADD_ENTITIES_TT',		'特殊文字変換');
define('_ADD_ULLIST_TT',		'リスト形式');
define('_ADD_NOLIST_TT',		'番号付きリスト形式');
define('_ADD_DLLIST_TT',		'見出しリスト形式');

最後に画像の追加
以下の5つの画像をnucleus/imagesに追加
20061105-button-pre.gif 20061105-button-entities.gif 20061106-button-ullist.gif 20061106-button-nolist.gif 20061106-button-dtlist.gif
こんな感じになる。
20080426-WS000003.JPG